
By Emily Rios, Learning and Content Developer, NGVi
After a Detailed Visual Inspection, a CNG Fuel System Inspector is responsible to determine the final disposition of the inspection, and if necessary, properly handle CNG cylinders with Level 2 and/or 3 damage. Many technicians ask if these cylinders can be isolated from the fuel system and left on the vehicle, or if they must be removed immediately. This article explains Level 2 and 3 damage and gives options for their final disposition.
Determining Level of Damage
Before discussing the final disposition of a Level 2 or 3 damaged cylinder, lets discuss reasons a cylinder may be classified this way. Level 2 cylinder damage is defined as damage that can be repaired by following the cylinder manufacturer’s repair guidelines or repaired by the manufacturer, if the manufacturer agrees it is repairable. Level 3 cylinder damage is defined as damage sufficiently severe that the cylinder “shall not be repaired and shall be condemned.”

Additionally, a cylinder must be classified as Level 3 when it has reached the end of its service life or if the cylinder is missing its manufacturer label and no replacement label is available. Level 2 damaged cylinders that cannot be repaired according to manufacturer’s guidelines are also reclassified as Level 3 damage.
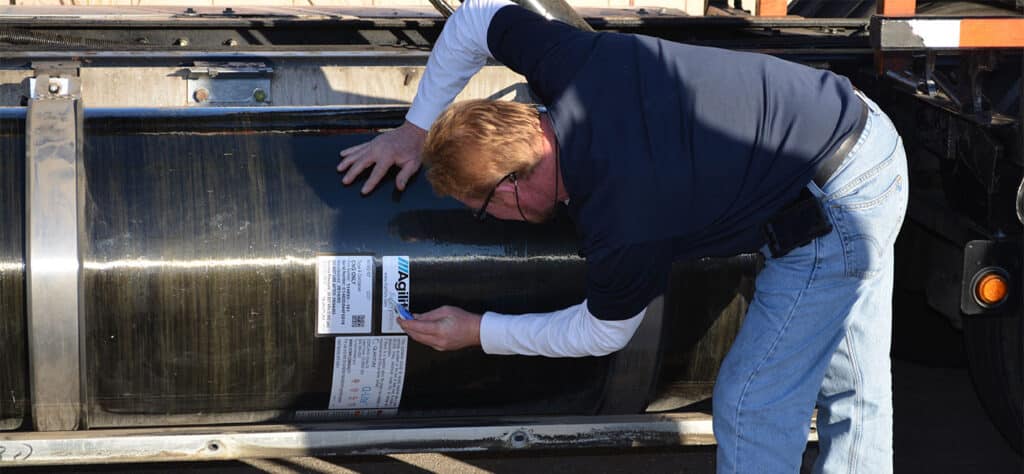
When performing a Detailed Visual Inspection, the technician must closely inspect each cylinder for any damage including abrasions, cuts, scratches, gouges, fractures, material loss, discoloration, evidence of impact or accident, and/or deterioration of the surface. If damage is found, it must be measured and classified according to manufacturer’s guidelines.When measuring damage, technicians must measure depth, width and length. However, the most important measurement is depth, as it is the most severe damage element affecting cylinder integrity. A depth gauge with a point is required.
Below is a chart of Level 3 damage criteria for Type 3 or 4 cylinders:
| Level 3 Damage Criteria – Type 3 or 4 Cylinders | ||
| Type of Damage | Depth (inches) | Notes |
| Cuts and Scratches | > or = 0.010 in | Consult manufacturer’s guidelines |
| Gouge Damage | > 0.015 in | |
| Fire and Excessive Heat | N/A | Evidence of fire or excessive heat exposure is automatic Level 3 damage |
| Chemical Attack | N/A | Evidence of blistering, swelling, resin removal, broken or loss fibers, stress corrosion cracks, or fracture is Level 3 damage |
| Leakage | N/A | Cylinders with irreparable gas leakage is Level 3 damage |
| Abrasions | > 0.010 in | |
| Impact Damage | N/A | Impact damage can cause more severe damage within the wall of the cylinder than at the surface. Consult manufacturer’s guidelines. |
Note: This is a general chart of Level 3 Damage. ALWAYS consult manufacturer’s guidelines.
Next Steps
Once Level 2 or 3 damage is identified, the affected cylinder must be defueled immediately. It is important to note that when Level 2 damage is not repairable according to the manufacturer’s guidelines, it is reclassified to Level 3 damage. A “failed” label or lockout tag must be applied to the cylinder near the manufacturer label. While waiting to repair or replace the cylinder, it may be 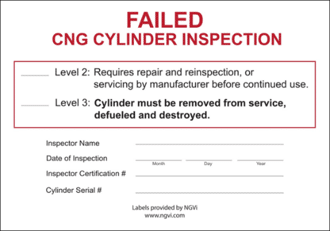 isolated from the fuel system and remain on the vehicle. Level 2 cylinders that have been isolated, removed and repaired may be reinstalled in their previous location according to manufacturer’s guidelines.
Level 3 damaged cylinders may remain on the vehicle permanently as long as they have been defueled and are isolated from the remainder of the fuel system. However, this may not be practical because it reduces the range of the vehicle. Therefore, the most common practice is to remove the Level 3 damaged (and defueled) cylinder and replace it with a new cylinder of the same size and in the same location. Always consult company policies or procedures and cylinder manufacturer guidelines.
Repairing or Condemning and Destroying
When a cylinder must be removed from the vehicle to repair or condemn and destroy, specific steps must be taken.
| Level 2 Damage – Defuel, Remove, Repair | Level 3 Damage – Defuel, Condemn, Destroy |
|
1. Ground the fuel system prior to defueling. A static charge is created by the flow of fuel through the fuel system during the defueling process. Grounding the fuel system removes this static charge. |
1. Ground the fuel system prior to defueling. A static charge is created by the flow of fuel through the fuel system during the defueling process. Grounding the fuel system removes this static charge. |
|
2. Defuel the cylinder. Most vehicles have more than one cylinder, therefore all cylinder valves must be closed before defueling the Level 2 damaged cylinder. The procedure described here is generic. Follow manufacturer’s specific guidelines for defueling your cylinders. a. Connect the defueling nozzle on the defueling hose to the defueling receptacle on the vehicle defueling system. b. Next, connect the defueling nozzle on the other end of the defueling hose to the receptacle of the stationary defueling apparatus. c. Next, open the valve on the cylinder needing to be defueled. d. Lastly, turn the valve on the vehicle defueling system to the open position and begin defueling. |
2. Defuel the cylinder. Most vehicles have more than one cylinder, therefore all cylinder valves must be closed before defueling the Level 3 damaged cylinder. The procedure described here is generic. Follow manufacturer’s specific guidelines for defueling your cylinders. a. Connect the defueling nozzle on the defueling hose to the defueling receptacle on the vehicle defueling system. b. Next, connect the defueling nozzle on the other end of the defueling hose to the receptacle of the stationary defueling apparatus. c. Next, open the valve on the cylinder needing to be defueled. d. Lastly, turn the valve on the vehicle defueling system to the open position and begin defueling. |
|
3. Remove the cylinder. a. Close the cylinder valve and disconnect all piping from the cylinder valve and PRD(s). b. Remove cylinder from the vehicle. |
3. Remove the cylinder. a. Close the cylinder valve and disconnect all piping from the cylinder valve and PRD(s). b. Remove cylinder from the vehicle. |
|
4. Repair the cylinder according to manufacturer’s guidelines. |
4. Flush with water or inert gas, like nitrogen. DO NOT use shop air to purge a CNG cylinder. Air is an oxidizer, and even if the cylinder is completely defueled, the cylinder will contain enough residual flammable gas that could ignite from a chemical reaction. |
|
5. Return the cylinder to service. a. Reinstall cylinder on the vehicle. b. Reconnect the piping to the cylinder valve and PRD. c. Open cylinder valves on all cylinders. This allows the pressure to be equalized among all cylinders before fueling the vehicle. |
5. Drill two or more ½ inch holes through the sidewall of the cylinder. In addition, industry best practice also recommends 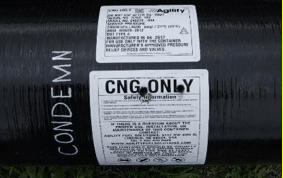 that the threads on the end-boss of each end of the cylinder be filed, so that a cylinder valve cannot be reattached. that the threads on the end-boss of each end of the cylinder be filed, so that a cylinder valve cannot be reattached. |
| 6. Dispose of cylinder If permissible by local refuse company, cylinder may be placed in the refuse disposal bin. |
Determining the level of damage and taking the proper steps to repair or replace a cylinder help ensure the safety of CNG vehicle drivers and technicians—as well as the public.
Details about determining damage levels and steps that need to be taken are covered in NGVi’s CNG Fuel System Inspector training course.
|
NGVi’s offers ASE-accredited training courses that cover the full spectrum of knowledge and skills required for technicians to be able to work safely on and around natural gas vehicles. For more information about training and certification related to this subject, click here. |